Hey there, welcome to the workshop, and thanks for pulling up a chair. If you’ve ever knelt under a sink mid-pipe repair, or grabbed a power drill for your deck project, only to spot that crinkled, rusted flat washer sitting right where it shouldn’t, you’re in the right place. I’m Jake, and I’ve spent the last six years running a shop that’s supplied flat washers to plumbers, contractors, and DIYers across the country—so I’ve pulled more than my share of old, worn washers out of tight spots, and I’ve watched a lot of folks fumble through this step for the first time, too. Replacing a flat washer isn’t rocket science, but skip a small step or use the wrong washer, and you’ll be redoing your work (or fixing a leak, or stopping that annoying rattle) all over again next week. Today, I’m walking you through exactly how to do it right, with tips you won’t find in a generic DIY video—and a few mistakes I see people make every single day. Flat Washers
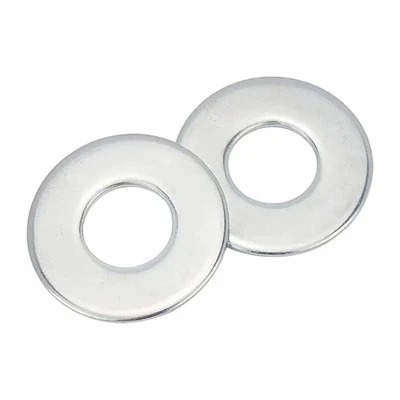
First, let’s get clear on what a flat washer actually does, because that’s the foundation of choosing the right one (and replacing it correctly). A lot of folks think it’s just a thin metal ring for show, but no—its whole job is threefold: it distributes the load of a fastener, like a bolt or a screw, so the fastener doesn’t tear through the surface it’s clamping down on; it seals gaps between two materials to stop leaks; and it helps spread out vibration to keep parts from working loose over time. That rusted, crusty washer you found under that old faucet? It’s probably failing on all three counts, and that’s why you’re here.
Before you even touch tools, step one is gathering the right supplies—and this is where most people mess up. They grab any old washer from their junk drawer, and that’s a quick path to frustration. Here’s what you need, and how to pick it: First, you need to match the washer’s inner diameter to the fastener you’re using. If your bolt is a ¼-inch, your washer’s inner hole needs to be exactly that—too big, and it’ll spin on the bolt; too small, and it’ll split when you tighten the fastener. Next, the outer diameter matters too: a washer that’s too small won’t distribute enough load, and one that’s too big can get in the way of adjacent parts. Then, the material. I can’t stress this enough, and as a supplier, this is the question I get asked most: pick your washer material based on where it’s going. If it’s for a dry deck or a woodworking project, standard zinc-plated steel works fine—it’s cheap, corrosion-resistant enough for indoor or covered outdoor use. If it’s for a bathroom sink, an outdoor patio, or a car engine bay (where it’ll be exposed to moisture or chemicals), go for stainless steel—304 grade is the workhorse, cheap, and won’t rust. If you’re working with aluminum or galvanized steel, skip regular steel washers—they’ll cause galvanic corrosion, which will eat through both parts faster than you can blink. For high-temperature applications, like a furnace or an oven, go for a brass or silicone washer. And don’t forget the rating: there’s a standard, called ASME B18.2.1, that covers flat washers in the U.S.—stick to that, and you won’t have to guess if it’ll fit. If you’re not sure what rating or material you need, just reach out—I’ll help you sort it out, no sales pitch attached.
Next, prep your work area and your parts. Turn off the water supply if you’re working on plumbing, or disconnect power if you’re working on an electrical part, or remove any parts that are blocking the old washer. You don’t want to be halfway through and have a sudden gush of water (or a shock) ruin your day. Once the area is safe, it’s time to remove the old washer. Here’s where patience pays off. If the washer is stuck tight, maybe rusted to the bolt or the surface, don’t yank it with pliers—that’ll bend the washer, and possibly the bolt or the surface around it. Instead, grab a small flathead screwdriver, gently pry at the edge of the washer to loosen it. If it’s really corroded, a quick shot of penetrating oil (like WD-40) will work wonders—let it sit for 10 minutes, then try again. If the washer is part of a tight assembly, like a bolt holding a car’s wheel hub, you might need to loosen the fastener a little first, not all the way out—just enough to get the old washer sliding free. Once the old washer is off, take a second to clean the surface where the washer sits. Dirt, rust, old caulk, or debris under the washer will throw off the seal and the load distribution, even if you put a perfect new washer on. Wipe it down with a rag, or a wire brush if there’s tough rust, to get a smooth, clean surface.
Now, the part everyone overthinks: installing the new washer. First, double-check that the washer is the right way around. That might sound silly, but I’ve seen this mistake a hundred times—especially with plumbing washers. The flat, smooth side goes against the surface of the part you’re clamping down, and the slightly rougher, chamfered edge goes towards the fastener. Wait, no—hold on, let me correct that, and get this right because it’s critical for seals. For most standard load distribution, the flat face should be against the softer or more delicate surface, right? Like, if you’re clamping a wood tabletop with a bolt, put the flat side of the washer against the wood, so it doesn’t scratch it and spreads the load evenly. If you’re using the washer for a seal, like under a faucet, the thicker, recessed side should face the water path, so it can make a tight seal. If you get this backwards, you might have a leak you can’t figure out. Next, slide the washer onto the fastener. Make sure the inner hole is lined up correctly—again, too tight a fit here means you’ll have to force it, and too loose means it’ll wobble. Once it’s on, hand-tighten the fastener first, don’t grab a wrench right away. That lets you align everything correctly, so you don’t cross-thread the bolt, which would mean taking the whole thing apart and starting over.
Now, tightening the fastener—this is where you finish strong, and avoid the number one mistake I see: over-tightening. A lot of people think tighter is better, but that’s not true for washers. Over-tightening will compress the washer too much, flatten it entirely, and kill its ability to distribute load or seal. For plumbing, you want to tighten until there’s no more wiggle, then give it a quarter-turn with a wrench—that’s enough for a tight seal. For woodworking, tighten until the washer is just sitting flat, no gaps, and the wood isn’t starting to crack around the edge. For heavy-duty applications, like automotive parts or structural beams, follow the torque specs from the manufacturer. If you don’t know the torque spec, a general rule is to tighten until the assembly is secure, and you can’t turn the fastener anymore by hand, without the washer deforming. After you tighten, do a quick check: wiggle the part a little, make sure there’s no play, and if it’s a plumbing joint, turn the water back on and check for leaks. If you have a leak, don’t crank down harder—loosen the fastener, pull the washer, check for debris under it, and make sure you used the right size and material.
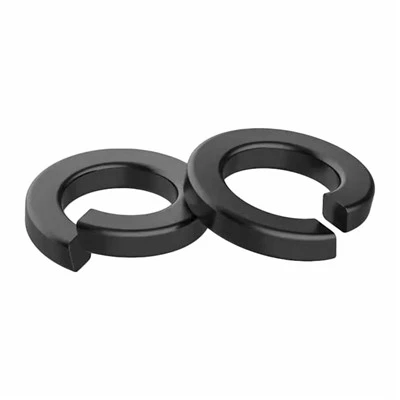
Wait, let’s talk about special cases, because not every job is a simple bolt and wood. What if you’re replacing a flat washer for a high-vibration part, like a car door hinge, or a washing machine drum bolt? In that case, a standard flat washer might not be enough—you can use a split lock washer alongside it, but only if the outer diameter of the lock washer matches the flat washer, so you’re still distributing the load evenly. Never use a lock washer on its own—it’ll dig into the surface and cause damage. What if you’re in a pinch and don’t have the exact washer size? Don’t cut a piece of metal from a can or a bottle cap—those are the wrong thickness and material, and they’ll fail fast. If you need a temporary fix, use a washer that’s slightly bigger, and add a small shim to fill the gap, but don’t leave it that way long.
Let me share a quick story to drive this home, because real-life examples stick. Last month, I got a call from a contractor who’d just finished re-piping a bathroom, and the sink was leaking so bad it was dripping through the ceiling of the floor below. He’d used old washers from his junk drawer, which were the wrong size for the compression fittings. He’d tightened them as hard as he could, and when he turned the water on, the old washer cracked, and the seal failed. He came to my shop, picked up the correct size ½-inch stainless steel flat washers, and a few minutes later, his repair was done, no leak. That’s exactly why getting the right washer is non-negotiable—cut corners here, and you end up doing the work twice.
I’ve spent 12 years in the flat washer business, and I’ve learned that the best repairs aren’t about fancy tools or over-tightening—they’re about taking the time to get the right part, prep the surface, and install it correctly. Whether you’re a DIYer tackling your first sink repair, a contractor working on a commercial build, or a hobbyist fixing your lawnmower, replacing a flat washer is a small step that makes a huge difference in how long your repair lasts.
If you need help picking the right washer, have questions about a specific application, or are looking to source flat washers for any project, we’re here to help. Don’t overcomplicate it—just reach out, and we’ll guide you through every step, no pressure, no jargon.
Fully Threaded Bolts REFERENCES
- ASME B18.2.1, Fasteners – Washers, 2020
- The Engineer’s Guide to Flat Washer Selection, Society of Mechanical Engineers, 2021
- Plumbing Repair Best Practices, International Association of Plumbing and Mechanical Officials, 2022
Handan Jihao Fastener Co., Ltd.
We’re known as one of the most professional flat washers manufacturers and suppliers in China. With abundant experience, we warmly welcome you to wholesale customized flat washers made in China here from our factory. If you have any enquiry about cooperation, please feel free to email us.
Address: A2, Row 31, Feiyu Screw World, Hebei Pu, Linmengguan Town, Yongnian District, Handan City, Hebei Province
E-mail: wenzhaona0@gmail.com
WebSite: https://www.chinaboltnut.com/
